 |
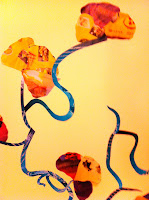
| Chinese Garden design with Landscape Made with Magazines and Glue |
For the bored, artsy, DIY-ers, recyclers, freegan-decoraters and anyone who enjoys making an unused space into artwork that is completely free!
Why buy posters? Why buy frames for pictures? Make them! Create your own in-home art murals with nothing more than magazines and stick glue. This first installation of DIY decorating will cover how to make homemade murals for your living space.
 |
| Pick a theme or design to work with |
1. Come up with an idea of what you want as a mural. Think about the size. If you have a large space than consider doing a large landscape, or large animal mural. If it is a small space think about what kinds of things you are interested in or want to walk by everyday and see. For me I picked an outdoor scene on my living room wall to make the space more colorful and open than a plain white wall. Look up an image for what you are going to immulate onto your wall or work from scratch. I like to look at ideas online to think about what kind of a plan to follow.
 |
| Magazine paper is best for easy removal |
2. Gather together old magazines (National Geographic works the best because of all the full color pages). Cut out the pages with large blocks of one color. Start compiling piles of pages and cut outs that are made up of one color (i.e. Green, Red, Orange, Yellow,etc...).
 3. Cut out multiple pieces of paper according to the kind of image you are going to make. This shape I use almost all the time as
  |
| Cut out using this shape for a smooth finished look |
4. Start applying to the wall! You can draw out a design to with pencil and have something to guide your placement or you can work from eyeballing it. Using magazine paper makes the take-down of the mural easy if you are in a temporary space such as a college dorm room, a one-year apartment space, or your friend's place who doesn't want your mural of a clown on their wall for eternity.
5. Finished! Whatever image your putting on the wall it is always easier to use large pieces, but small details always add to the finished work. Check out these details to get some ideas for your own mural making.
 |
| Up close view of paper |
 |
| Lovely Trees |
 |
| Flower Motif |
*For easy removal just pull off the pieces and some residue will be left but will come off very very easily with a rag and water with no damage to the paint job.


No comments:
Post a Comment